Saturday, October 30, 2010

How to get patameter from querystring of URL

Query string is frequently used for passing variables or parameters between client (browser) to server (web application) when request a web page. Almost all server side languages have standard function to parse query string to get parameters. But sometimes for some reason you will need to variables and parameters at client side. Java Script is most popular client side language, but does not have stand parser to get parameters or variable from Query String.

Here are code some that will help you get variable or parameter from query string of web page URL.

Java Script code (client side code)

//--------------------------------------------------------
// Get a querystring parameter/variable value from URL
// If no variable specified, return a default value
//--------------------------------------------------------
function get_param_from_querystring(name, defval)
{
name = name.replace(/[\[]/,"\\\[").replace(/[\]]/,"\\\]");
var regex = new RegExp("[\\?&]"+name+"=([^&#]*)");
var res = regex.exec(window.location.href);
if(res == null) return defval;
else return res[1];
}


Here is PHP code (server side code)

//--------------------------------------------------------
// Get a querystring parameter/variable value from URL
// If no variable specified, return a default value
//--------------------------------------------------------
function get_param_from_querystring($name, $defval)
{
if(isset($_GET[$name]))return $_GET[$name];
else return $defval;
}

Friday, October 29, 2010

Web site templates - Christmas Website templates, Christmas flash templates

# The Christmas Website Templates category is exactly what you need to give your website a fresh and glamorous Holiday look. Whether you have an online gift store powered by osCommerce, CRE Loaded or ZenCart, a WordPress blog or any other kind of online website you can be sure that with our Christmas Templates your website will be transformed into a pleasing Holiday vision for your visitors this Christmas Season.

At All Budget Shop, we provide a variety of professional designed ready to use Christmas website templates and flash templates for you for download instantly.

Download your Christmas website templates here.


About Christmas
# Christmas or Christmas Day is a holiday observed mostly on December 25 to commemorate the birth of Jesus, the central figure of Christianity. The date is not known to be the actual birth date of Jesus, and may have initially been chosen to correspond with either the day exactly nine months after some early Christians believed Jesus had been conceived, the date of the winter solstice on the ancient Roman calendar, or one of various ancient winter festivals. Christmas is central to the Christmas and holiday season, and in Christianity marks the beginning of the larger season of Christmastide, which lasts twelve days

# Popular modern customs of the holiday include gift-giving, music, an exchange of greeting cards, church celebrations, a special meal, and the display of various decorations; including Christmas trees, lights, garlands, mistletoe, nativity scenes, and holly.

PrestaShop Information - a new module iAdvize for customer relation by Chat is released

iAdvize is a client-relation management Chat solution, allowing you to respond directly to a site’s visitors and orient them toward the solution or the product that best fits their needs.


iAdvized contains a dialogue box in the lower part of the screen, which remains visible during navigation, depending on the operators’ availability or the rules or behavioral identification. At any moment the visitor can ask a site representative for some advice or some help navigating around the site.

The iAdvize module will be added by default to version 1.4 of PrestaShop. The compatible module for version 1.3 is already available on our download page. All you have to do is sign up at iadvize.com to activate the code from your PrestaShop Back-Office.

You can download he module iAdvize HERE
For more information about iAdvize, please visit HERE

Sunday, October 24, 2010

PrestaShop Tips - How to setup development on windows flatform

If you are an owner of PrestaShop or you are taking care of someone's PrestaShop website, you maybe want to setup a development environment for your PrestaShop website, because you will have to make some changes or do some customization of the website. It is a not a good practice to make any change directly on your public service PrestaShop website.

All changes and customization must be done at separated environment and tested before they can be applied to public PrestaShop website.

Here I am going to explain on how to setup an WAMP environment on Windows platform.

1. Download WampServer 2.0i
WampServer is an open source project, free to use (GPL licence). Currently stable version is WampServer 2.0i [07/11/09]. It includes following components.

- Apache 2.2.11
- MySQL 5.1.36
- PHP 5.3.0

Please download it from http://www.wampserver.com/en/download.php

You can download it from here : http://www.wampserver.com/en/download.php

2. Run the downloaded installer, and follow the installation guide to finish install.
By default, it will be installed on c:\wamp\

3. Start WAMP Server Manager by double click on c:\wamp\wampmanager.exe
You will see an WAMP server manager appear on the windows right bottom corner.


4. Start all service by clicking "WAMP server manager" - "restart all service"

5. You are all set, everything is ready.
Please access http://localhost/phpmyadmin/

So far, your web server are only accessible from local machine by http://localhosst/,
if you want to access your web server from other computer by IP address or hostname,you will encounter error "Forbidden - You don't have permission to access / on this server."

you will need to have make some change on on the configuration file to allow access your WAMP server from other computer.

6. Make your WAMP web server accessible from other computer.
6.1 open file C:\wamp\bin\apache\Apache2.2.11\conf\https.conf
6.2 look for following code


<Directory "c:/wamp/www/">
....
Order deny,allow
Deny from all


and change the two line bottom two lines to


<Directory "c:/wamp/www/">
....
Order allow,deny
Allow from all


6.4 Restart all service of your WAMP server as instructed at STEP 4
By now, you should be able to access your WAMP server from other computer.

Saturday, October 23, 2010

PrestaShop Information - Offers two new payment options PaysafeCard and Cash-Ticket

PrestaShop offers to its users two new payment options: PaysafeCard and Cash-Ticket.
The products are fast, easy and safe: All the consumer has to do is select one of the products as payment method and enter the 16-digit PIN code printed on the “PaysafeCard” or the “Cash-Ticket”.


For online-shops, offering PaysafeCard or Cash-Ticket means reaching out to new target groups: either those who are concerned about their security when disclosing credit card numbers or bank account details on the Internet, or those who do not have a credit card at all. In addition, PaysafeCard and Cash-Ticket are 100% chargeback-free as they are prepaid methods. The only thing that is required is signing the contract for the product you would like to offer.

Both PaysafeCard and Cash-Ticket will be pre-installed in the 1.4 version of PrestaShop. Compatible modules are already available for PrestaShop v.1.3 on PrestaShop official download page.

Dowwnload PaysafeCard and Cash-Ticket modules for PrestaShop v.1.3

Wednesday, October 20, 2010

PrestaShop Tips - How to add email to invoce and delivery slip

In PrestaShop, the delivery slip and invoice are generated as PDF. Most store owner would like to have some kind of customization, like change format(layout) of delivery and invoice, or add some more information to invoice/delivery.

Here is a very simple example that add customer email address and order # to the delivery and invoice address contact part. This is very easy customization, what you have to do is:

Modify ./classes/PDF.php file as following.

Find following code block by search for !empty($delivery_address->phone_mobile.


if (!empty($delivery_address->phone_mobile))
{
$pdf->Ln(5);
$pdf->Cell($width, 10, $delivery_address->phone_mobile, 0, 'L');
}


Right after above code, add following code


$pdf->Ln(5);
$pdf->Cell($width, 10, $invoice_customer->email, 0, 'L');
$pdf->Ln(5);
$pdf->Cell($width, 10, self::l('ORDER #:') .sprintf('%06d', $order->id), 0, 'L');


You are ready to go.

Please note:
1. I have tested this on ver 1.3.1 (not sure for other versions)
2. This change will also affect invoice because they share the same content.

Tuesday, October 19, 2010

Web site templates - Casino and Online Cansio website templates and flash templates

#Website templates and flash templates at All Budget Shopare ready-made web designs, that can be used as a basis for fast and high-quality website. Those website templates, flash templates and all other products are completely customizable and ready for immediate download. They are best designed by professional designers and provide you with web templates design of premium quality.

#Online casino is a very specific field in e-commerce that is really growing. We offer web templates, flash templates and other templates all with the casino in mind. These templates have all the details that online gamblers want to see.
About Online casino

#Online casinos, also known as virtual casinos or Internet casinos, are online versions of traditional ("brick and mortar") casinos. Online casinos enable gamblers to play and wager on casino games through the Internet.

#Many online casinos lease or purchase their software from well-known companies like Microgaming, Realtime Gaming, Playtech, and CryptoLogic Inc in an attempt to "piggyback" their reputation on the software manufacturer's credibility

#Online casino types: Online casinos can be divided into two groups based on their interface: web-based and download-only casinos. Some casinos offer both interfaces.

# Most popular games offered: Baccarat, Blackjack, Craps, Roulette, Online slot games, Online poker, Keno

PrestaShop Tips - How to enable password confirm at singn up

When you sign up a new account online or at any application, most cases you will be asked to input your password and then re-type it for confirmation to avoid mistakes. But at PrestaShop, you will NOT be asked to input confirm password (re-type your password), this brings trouble to some careless customer who mistypes the password without awareness. Because of this, many store owners are looking for a solution to enable password confirm functionality.

Here you will find the solution that enable your customer to retype password for confirmation (password confirm) at account sign up at PrestaShop.

1. Add a new field to the sing up for password confirm at file ./themes/YourTheme/authentication.tpl.
Search in file authentication.tpl for following blue highlighted text class="required password", you will find following exiting code for password field.


<p class="required password">
<label for="passwd">{l s='Password'}</label>
<input type="password" class="text" name="passwd" id="passwd" />
<sup>*</sup>
<span class="form_info">{l s='(5 characters min.)'}</span>
</p>


Insert the following new code right after above code.


<p class="required password">
<label for="passwd_confirm">{l s='Confirm password'}</label>
<input type="password" class="text" name="passwd_confirm" id="passwd_confirm" />
<sup>*</sup>
</p>


2. Add validation to validate password is matched at ./authentication.php
Search in file authenticatio.php for following blue highlighted text isSubmit('submitAccount'), you will following code


if (Tools::isSubmit('submitAccount'))
{
$create_account = 1;
$smarty->assign('email_create', 1);
$validateDni = Validate::isDni(Tools::getValue('dni'));

if (!Validate::isEmail($email = Tools::getValue('email')))
$errors[] = Tools::displayError('e-mail not valid');
elseif (!Validate::isPasswd(Tools::getValue('passwd')))
$errors[] = Tools::displayError('invalid password');


Append following code right after above code


elseif (Tools::getValue('passwd') != Tools::getValue('passwd_confirm'))
$errors[] = Tools::displayError('your password and confirm password input do not match');


3. Congratulations! You are done. You can test your work now.

Note:
If your store are supporting multiple language, you will need to translate a new password confirm validation error message.

On how to translate, see PrestaShop related documents.

Sunday, October 17, 2010

PrestaShop Tips - How to display user group name on front store

Sometime, you may want to display Group Name information of current logged customer on front store. At current version of PrestaShop(1.3.1), there seems no way to display group name of customer at front store without customization. Here I explain on how to do some small change so that you can display customer group name at User Info Block.

Note:
A customer could belong to multiple group, this customization only bring the group name with largest id which the customer belongs to.
It is possible to bring all group names, it will need more code. Hope you can do it by yourself.

Here is how to do this
1. Adding getGroupName function to Group class.
File: ./classes/Group.php

Go to the bottom of file Group.php, you find following two lines at bottom

}

?>


Add following code right before above two lines:


static public function getGroupName($id_customer, $id_lang)
{
$sql = '
SELECT gl.`name`
FROM `'._DB_PREFIX_.'group` g
LEFT JOIN `'._DB_PREFIX_.'customer_group` cg ON (cg.`id_group` = g.`id_group` AND cg.`id_customer` = '.intval($id_customer).')
LEFT JOIN `'._DB_PREFIX_.'group_lang` AS gl ON (g.`id_group` = gl.`id_group` AND gl.`id_lang` = '.intval($id_lang) . ')
ORDER BY g.id_group DESC
';
return Db::getInstance()->getValue($sql);
}


2. Getting group name and set to variable
File: ./init.php
Add following line before line 158 and before line 200 (which are exiting lines for customerName)


'groupName' => ($cookie->id_customer ? Group::getGroupName(intval($cookie->id_customer),intval(_USER_ID_LANG_)) : false),


3. Use it in User Info Block
If you have not installed this block, please do so by go Back Office - Modules - User Info Block.

At line 6 of ./modules/blockuserinfo.tpl, add ", group {$groupName}" after {$customerName}

Before change:


After change:

{$customerName}, group {$groupName} ({l s='Log out' mod='blockuserinfo'})


You are all set. You should be able to see group name of your customer displayed along with his/her name at front store now.

PrestaShop Tips - How to create standard size banners and logo

Recently there are a lot discussion on on the banner ads size. So far there is no any standard banner ads size defined by any organization. But But there are some guidelines from some market leaders worked like Google and Yahoo. Of course, everyone is free to define their own formats but we recommend you design your banners based on the guidelines to correspond with most advertisers.

Here are some of the standard banner ads size based on the guidelines.

Leaderboard (728 x 90 pixel)
Full Banner (468 x 60 pixel):
Half Banner (234 x 60 pixel):
Rectangle (180 x 150 pixel):
Square Button (125 x 125 pixel):
Micro Bar (88 x 31 pixel):
Skyscraper (120 x 600 pixel):
Wide Skyscraper (160 x 600 pixel):
Large Rectangle (336 x 280 pixel):
Medium Rectangle (300 x 250 pixel):

Click the image to see the real size of banner samples below

Thursday, October 14, 2010

PrestaShop Information - PrestaShop has decided to team up with SECUVAD


To help you combat online fraud and recover your outstanding debts, in France and internationally, PrestaShop has decided to team up with SECUVAD, winner of the 2010 E-Commerce Award for Security.
SECUVAD is the leading commercial company engaging in legal battle against fraud and recovering your online unpaid debts.


Just logged an outstanding payment? Forward it to SECUVAD in one click!
Find out all about these new features in the SECUVAD module:

* real-time scoring from 0.15 € + VAT per order
* expert analysis in under 2 hours
* guarantee against unpaid debts
* operational in France and internationally
* legal proceedings against fraudsters
* recovery of online debts

Download the SECUVAD module for PrestaShop

PrestaShop Tips - How to set currency correctly for default currency and Paypal restriction

PrestaShop supports multiple currencies. As a shop owner, you must understand the currency function correctly before you can set your currency related configuration. If you are using Payapl and you don't set it correctly, there might be errors prevent your payment process from going forward.

Here are some of the key points that will help you to understand. This information is for PrestaShop 1.3.1. I have not confirm other version, but I think most of them should have the same concepts.

1. Default currency


There is a default currency setting at your back office of your PrestaShop. This currency is used for

A. As currency conversion base
B. Your product price currency (the number you input at product price box, is in this currency)
c. Default currency of your front store displaying currency. User can select different currency. You must install and configure Currency Block to enable this selection.

Here is how to configure default currency.
Back office - Payment - Currencies


2. Paypal restriction currency.


This currency is used for Paypal payment. No matter what currency user selected at front store, when he/she goes Paypal payment page, PrestaShop will be automatically converted to this currency. The conversion rate is based on your setting at PrestaShop. You can select only one currency as Paypal restriction currency from your available currencies.

Please set your Paypal restriction Currency to your primary currency of your Paypal account to avoid potential errors.

Here is how to set the Paypal Restriction Currency at PrestaShop
Back office - Payment -


My experiment result


Default Currency: CAD (Canadian Dollar)
Paypal Restriction Currency: Euro
Front store selected currency: USD (US dollar)

1. By default the price was displayed as CAD, but selected USD at front store, so it changed to USD correctly.


2. When I went Paypal, it automatically converted to Euro and displayed as Euro at Paypal page. It is also correct as my setting.


Issues(bug?) I found


I found one problem when I did my experiment. While I selected USD at front store, went to Paypal page, it displayed Euro (it is as my setting). But when I cancel payment and came back to my home page, it displayed Euro. It seem that PrestaShop automatically change my currency selection. It should be kept my selection as USD. I this is a bug of PrestaShop.


See my another post on issues with Paypal 1.7 here

PrestaShop Tips - How to set discount for all prodcuts or products in a specific category in a batch way

At PrestaShop, you can set discount by percentage of by amount, or both. But as I know, you can only set this discount for products one by one. If you want to set discount for all products, or all products in a specific category, it will be very time consuming. But if you have access to database, you can use SQL statement to do it in seconds.

Here I introduce some of SQL to set discount for products in a batch way.

1. Set discount for all products.


Update `ps_product` set `reduction_percent`=YourPercentageDiscount,`on_sale`=1;

Please replace YourPercentageDiscount with your discount. For example 25 for 25 percantage.

2. Set discount for all products in a specific category


Update `ps_product` set `reduction_percent`=YourPercentageDiscount ,`on_sale`=1
where id_product in
(
select distinct id_product
from ps_category_product
where id_category=YourCategpryID
);


Please replace YourPercentageDiscount with your discount. For example 25 for 25 percantage.
Please replace YourPercentageDiscount with id_category. You can find id_category at you Back office.

If you want to set discount for all featured product, just replace YouCategpryID ID of id_category of Home which is 1 by default.

How to find id_category of your product categories
Catalog tab


How to find the id_category of Home(featured products)
Catalog Tab - Go any product detail

Wednesday, October 13, 2010

PrestaShop Tips - How to add new data fields in email template

At PrestaShop, emails are sent to customer or store owner some kind of events occurs, such as new order confirmation, new account registration.

Some of the email are sent by core PrestaShop, some of them are sent out via additional installed modules, such as mail alerts module.

The mail contents are generated by using email template. The data field which are represented by keywords in the template like {delivery_phone}, {invoice_firstname} are replaced by data from database when email is sent out.

Some time, you want add some more data field to customize default alert email templates. But before you can use keywords at email templates, you must define those keyword first and load data first before you can use it in the mail templates.

Here I try to give some instructions on how to add a new data fields to your email template. For example, you want add phone_mobile to your email.

The keywords are defined in following file

-- Prewstashop core
YourSiteRoot/classes/PaymentModule.php
-- ailalerts module
YourSiteRoot/modules/mailalerts/mailalerts.php

And here is sample code in above file that defines default keywords.

$templateVars = array(
'{firstname}' => $customer->firstname,
'{lastname}' => $customer->lastname,
'{email}' => $customer->email,
'{delivery_company}' => $delivery->company,
'{delivery_firstname}' => $delivery->firstname,
'{delivery_lastname}' => $delivery->lastname,
'{delivery_address1}' => $delivery->address1,
'{delivery_address2}' => $delivery->address2,
'{delivery_city}' => $delivery->city,
'{delivery_postal_code}' => $delivery->postcode,
'{delivery_country}' => $delivery->country,
'{delivery_state}' => $delivery->id_state ? $delivery_state->name : '',
'{delivery_phone}' => $delivery->phone,
'{delivery_other}' => $delivery->other,
'{invoice_company}' => $invoice->company,
'{invoice_firstname}' => $invoice->firstname,
'{invoice_lastname}' => $invoice->lastname,
'{invoice_address2}' => $invoice->address2,
'{invoice_address1}' => $invoice->address1,
'{invoice_city}' => $invoice->city,
'{invoice_postal_code}' => $invoice->postcode,
'{invoice_country}' => $invoice->country,
'{invoice_state}' => $invoice->id_state ? $invoice_state->name : '',
'{invoice_phone}' => $invoice->phone,
'{invoice_other}' => $invoice->other,
'{order_name}' => sprintf("%06d", $order->id),
'{shop_name}' => Configuration::get('PS_SHOP_NAME'),
'{date}' => $order_date_text,
'{carrier}' => (($carrier->name == '0') ? Configuration::get('PS_SHOP_NAME') : $carrier->name),
'{payment}' => $order->payment,
'{items}' => $itemsTable,
'{total_paid}' => Tools::displayPrice($order->total_paid, $currency),
'{total_products}' => Tools::displayPrice($order->getTotalProductsWithTaxes(), $currency),
'{total_discounts}' => Tools::displayPrice($order->total_discounts, $currency),
'{total_shipping}' => Tools::displayPrice($order->total_shipping, $currency),
'{total_wrapping}' => Tools::displayPrice($order->total_wrapping, $currency),
'{currency}' => $currency->sign,
'{message}' => $message
);


If you want some additional data fields, you have to check if there are existing keywords defined for your data. If not, then you have to find out if the data is defined as property of one of objects that are used in mailalerts.php, like Order, Delivery, Invoice and so on.

Then you can add keyword and property mapping, for example you want add mobile phone number to your email. Then you can implement as following.
1. Define keyword property mapping

'{invoice_phone_mobile}' => $invoice->phone_mobile,
....
'{delivery_phone_mobile}' => $delivery->phone_mobile,


2. use the new keywords in your email template.

The alert mail templates are located at following folder

--Core emails
/mails/en/

--Mail Alerts emails
/modules/mailalerts/mails/en/

Please replace /en/ with proper language code that you are using.

Monday, October 11, 2010

PrestaShop Tips - How to fix hack attempt error

At PrestaShop, if the system detect any inconsistent data, it will display "Hack Attempt". You will be surprised when you see this error. But in most cases, it is not because of hack attack. It is because of consistent data detected.

Here are a few of those cases that will cause this error.
1. If you use bookmark of a URL of PrestaShop site, and the URL contains some kind of token, next time when you access the same site from the bookmarked URL, this error will occurs.

2. If the address ID in an order record could not be found at address table, this error will also occur.

3. If your state ID in your address record could not be found in state table.

4. The system can not find the default country.
You can define default country at back office - shipping - countries


These are just a few examples.

If you experience this error, but you don't think is it hack attack, then try to figure if there is any data problem.

Saturday, October 9, 2010

PrestaShop Tips - How to make order number, delivery number and invoice number the same?

At PrestaShop, order number, invoice number and delivery numbers are issued separately and independently. I think that it is nature to have different order/invoice/delivery numbers. It is kind of business activity log of your store.

But for management convenience purpose, some store owners may want to keep the following three numbers same, but have different prefix.
- order number, for example Ord20021
- invoice number, for example, Inv20021
- delivery number, for example DLR20021

This approach is not recommended, but doable with some code changes. If you really want to make all those numbers to be the same, you have an option to do so in following way. The key points of this approach are:
1. Keep invoice/delivery ID as it is in database
2. Use order # for other (invoice/delivery) numbers when display on UI
3. Use the Order # for other (invoice/delivery) numbers when generate PDF document

How to make this happen?
Note
A. The line number below are for reference purpose only, they might be slightly different at your copy of version. Please search the keyword to find the exact locations.
B. The changes listed here are just guidance purpose, I have not tested it yet. Please do test it by yourself before put it in service.


1. Make delivery number the same as that of order #
Replace following lines "$order->delivery_number" to "$order->id"(5 files, 7 lines)


\admin168\pdf.php(line:48): PDF::invoice($order, 'D', false, $tmp, false, $order->delivery_number);
\admin168\tabs\AdminOrders.php(line:434): (($currentState->delivery OR $order->delivery_number) ? ' - <a href="pdf.php?id_delivery='.$order->delivery_number.'"><img src="../img/admin/delivery.gif" alt="'.$this->l('View delivery slip').'" title="'.$this->l('View delivery slip').'" /></a>' : '').
\admin168\tabs\AdminOrders.php(line:527): '.(($currentState->delivery OR $order->delivery_number) ? '<br /><a href="pdf.php?id_delivery='.$order->delivery_number.'">'.$this->l('Delivery slip #').'<b>'.Configuration::get('PS_DELIVERY_PREFIX', intval($cookie->id_lang)).sprintf('%06d', $order->delivery_number).'</b></a><br />' : '');
\classes\Order.php(line:693): $this->delivery_number = $number;
\classes\Order.php(line:716): if ($orderState->delivery OR $order->delivery_number)
\classes\Order.php(line:717): echo '<a href="pdf.php?id_delivery='.intval($order->delivery_number).'"><img src="../img/admin/delivery.gif" alt="delivery" /></a>';
\classes\OrderHistory.php(line:93): if ($newOS->delivery AND !$order->delivery_number)
\classes\PDF.php(line:219): PDF::invoice($orderObj, 'D', true, $pdf, false, $orderObj->delivery_number);


2. Make invoice number the same as that of order #
Replace following lines "$order->invoice_number" to "$order->id" (7 files, 15 lines)


\admin168\tabs\AdminOrders.php(line:433): ((($currentState->invoice OR $order->invoice_number) AND count($products)) ? ' - <a href="pdf.php?id_order='.$order->id.'&pdf"><img src="../img/admin/tab-invoice.gif" alt="'.$this->l('View invoice').'" title="'.$this->l('View invoice').'" /></a>' : '').
\admin168\tabs\AdminOrders.php(line:513): if (($currentState->invoice OR $order->invoice_number) AND count($products))
\admin168\tabs\AdminOrders.php(line:517): <a href="pdf.php?id_order='.$order->id.'&pdf">'.$this->l('Invoice #').'<b>'.Configuration::get('PS_INVOICE_PREFIX', intval($cookie->id_lang)).sprintf('%06d', $order->invoice_number).'</b></a>
\classes\Order.php(line:158): $fields['invoice_number'] = intval($this->invoice_number);
\classes\Order.php(line:677): $this->invoice_number = $number;
\classes\Order.php(line:710): if (($orderState->invoice OR $order->invoice_number) AND intval($tr['product_number']))
\classes\OrderHistory.php(line:91): if ($newOS->invoice AND !$order->invoice_number)
\classes\PaymentModule.php(line:342): if (intval(Configuration::get('PS_INVOICE')) AND Validate::isLoadedObject($orderStatus) AND $orderStatus->invoice AND $order->invoice_number)
\classes\PaymentModule.php(line:345): $fileAttachment['name'] = Configuration::get('PS_INVOICE_PREFIX', intval($order->id_lang)).sprintf('%06d', $order->invoice_number).'.pdf';
\classes\PDF.php(line:150): elseif (self::$order->invoice_number)
\classes\PDF.php(line:151): $this->Cell(77, 10, self::l('INVOICE #').' '.Configuration::get('PS_INVOICE_PREFIX', intval($cookie->id_lang)).sprintf('%06d', self::$order->invoice_number), 0, 1, 'R');
\classes\PDF.php(line:354): if (!Validate::isLoadedObject($order) OR (!$cookie->id_employee AND (!OrderState::invoiceAvailable($order->getCurrentState()) AND !$order->invoice_number)))
\classes\PDF.php(line:443): $pdf->Cell(0, 6, self::l('INVOICE #').Configuration::get('PS_INVOICE_PREFIX', intval($cookie->id_lang)).sprintf('%06d', self::$order->invoice_number).' '.self::l('from') . ' ' .Tools::displayDate(self::$order->invoice_date, self::$order->id_lang), 1, 2, 'L', 1);
\order-detail.php(line:88): 'invoice' => (OrderState::invoiceAvailable(intval($id_order_state)) AND $order->invoice_number),
\pdf-invoice.php(line:17):elseif (!OrderState::invoiceAvailable($order->getCurrentState()) AND !$order->invoice_number)

PrestaShop Tips - How to change module block positions on a page

At PrestaShop, most features and functions are installed as add-on modules and they appear as blocks on page UI. You can hide/show or change positions of those blocks at back office according to your preferences. Below is a brief instructions on how to do this.

0. Log in to your Back office
1. Click "Modules" tab
2. Click "Positions" sub-menu
3. Use the arrow icon to move up or down to change positions of block.
4. Click x to hide block if you want.


The block are separated into different section left column blocks, right column blocks, header contents blocks and so son.

PrestaShop Tips - How to fix sort problem in State dropdown list

At PrestaShop, if you are shipping your products to a country that contains States, you will have to manually create States list at you back office. And also you have to set the country as "Contains states". If you do not configure correctly, there will be some errors at payment process, at least this will happen if you use Paypal.
See here on how to configuration for country contains States


If you are using 1.3.1 or lower, here is another problem if you don't input States data in the alphabetical order of name. The drop down list in address page will displayed incorrectly at FireFox.

See below screen for FireFox and IE.


Why would this happen?
I checked that the data is sorted correctly in both source code PHP and Javascript. The problem is caused by different browser. It seems that IE and FireFox behave in different. I guess that FireFox is using the value[key] as sort key to display stats the drop down list, not in the order that PrestaShop prepared in a Javascript array.

See here is Javascript code in HTML page:


Solution:
The only solution I can figure out for this issue, is to change the ID of your states to make them in a correct order.

I also heard that the new version 1.3.2 of PrestaShop has fixed the problem, so you have another option to upgrade to a new version 1.3.2.

Temporary Fix solution 1:
Delete those States that are not in correct order.
Re-input your States data in alphabetical order of the State Name.

Temporary Fix solution 2:
Re-assign the ID in database, by tools like PhpMyAdmin. But you must start the new ID from the max number that currently used in State table.

Note:
After you modified your state data, you must update your related state ID in address tables, other wise, when you use existing account/address to place an order, error will occurs.

The following post discussed on how to fix the problem by change PHP code, you can have a try.

http://www.prestashop.com/forums/viewthread/73116/

PrestaShop Tips - How to sort and filter data at back office data management

At PrestaShop back office, all data management page are using the same architecture. There is a very useful function to help focus your job.

- Filtering function - This function it to filter out the data list based on the data you are working on, for example, if your are working on managing States, you can filter out the States by the country you working on, i.e. "Canada"

- Sorting function - This function is to sort your data in a your preference way, in ascending or descending. You can sort for any field and simple click arrows under the field name on the header row.

See the screen shot for your reference.

Thursday, October 7, 2010

RIA Tips - Domain Service Class Wizard Doesn't Find Entities

Have you ever experienced that when you try to add new Domain Service, the Domain Service Class Wizard Doesn't Find Entities? Even if you have selected a existing Entity Data Model? See the below screen.


Click to enlarge screen image

Here are some of the scenarios that lead to above situation appears.
1. You have just added the Entity Model (.edmx), but have not build your project yet. Because the Domain Service Class Wizard needs refer the CSDL, SSDL, MSL files to get the list of entities. Those files are generated from Entity Data Model when you build your project. By default those files are included in the output assembly DLL file, not visible. See here on how to do those file visible

Solution: Before adding Domain Service, build your project after yous Entity Data Model is created.

2. If you have manually created CSDL, SSDL, MSL files instead of using the Entiy Data Model Wizard that comes with Visual Studio. (See here on how to manually create Entity Data Model)

If you have created your those file manually, Domain Service Class Wizard does not know where to find those files.

3. You have generated Entity Data Model by Entity Data Model, but you set Meta Artifact Processing of you model to "Copy To Output Directory" instead of default "Embed in Output Assembly".

Solution: Set Meta Artifact Processing back to default "Embed in Output Assembly".
See my another post on how to do this

It seems that Domain Service Class Wizard only look into output assembly(BUG?).

In this case, you can see CSDL, SSDL, MSL files under your bin folder. This also cause Domain Service Class Wizard can not find the entities.

4. Visual Studio is screwed up, is working properly.

Solution: Restart Visual Studio

PrestaShop Information - Cost effective video solution

PrestaShop now offers you the most cost effective video solution: Treepodia e-commerce video platform

Special! Get a $750* credit from PrestaShop to cover your entire catalog with great product videos and test the Treepodia system free of charge!
With a few simple mouse clicks, Treepodia enables online retailers to automatically cover all products with dynamic videos in less than an hour.
The video content is always up-to-date with price changes, user reviews and special promotions. The videos are then syndicated to leading video sharing sites as well as the major search engines via a Dynamic Video Sitemap, to increase SEO.

More information about Treepodia visit:
http://www.prestashop.com/en/partner_treepodia/

Wednesday, October 6, 2010

PrestaShop Tips - How to allow mutiple access at maintenance mode without IP address

PrestaShop has a maintenance mode which only allow access from specified IP addresses. This function is very good and can satisfy most store owner's needs.

But for some reason (e.g. testing),if you want allow multiple users to access, you will have to collect all user's IP addresses. Another problem is that most store owners are using dynamic IP address. It is troublesome to look up his/her public IP and change the setting.

Here is I introduce a solution that can solve above problem. It only requires a few lines of code.

[Solution]
The solution is to use the same maintenance mode setting, but I will use the IP address field as Maintenance Access Token. Then at maintenance mode, you access your front store with the Maintenance Access Token as URL parameter.

1. Change ./init.php to make this happen
Replace line 204 with following lines.(line # may differ, see screen shot for detail)


session_start();
if(isset($_GET['MAT']))$_SESSION['MAT'] = $_GET['MAT'];
if (isset($maintenance) AND (!isset($_SESSION['MAT']) OR $_SESSION['MAT'] !=Configuration::get('PS_MAINTENANCE_IP')))


For 1.4x, you need change as following (thanks Debbie for the contribution)

Find this line in file /classes/FrontClass.php,

if (!in_array(Tools::getRemoteAddr(), explode(',', Configuration::get('PS_MAINTENANCE_IP'))))

replace it with this:

session_start();
if(isset($_GET['MAT']))$_SESSION['MAT'] = $_GET['MAT'];
if (!isset($_SESSION['MAT']) OR $_SESSION['MAT'] !=Configuration::get('PS_MAINTENANCE_IP'))


2. Set you site to maintenance and set Maintenance Access Toeken


3. Access your site with Maintenance Access Token
http://yoursiteurl/index.php?MAT=aaa.bbb.ccc.ddd

Now you access at maintenance mode without look up your IP address any more.

Tuesday, October 5, 2010

ADO.NET Entity Framework TIPS -What is CSDL, SSDL, MSL, EDMX Files

What are CSDL, SSDL, and MSL Files


CSDL - Conceptual schema definition language.
SSDL - Store schema definition language
MSL - Mapping specification language
are XML-based languages that respectively describe the conceptual model, storage model, and the mapping between these models. In an Entity Framework application, model and mapping metadata are loaded from three files with extensions .csdl, .ssdl, and .msl. The metadata contained in the .csdl and .ssdl files is loaded into instances of the System.Data.Metadata.Edm.EdmItemCollection and System.Data.Metadata.Edm.StoreItemCollection classes, which are accessible by using methods in the System.Data.Metadata.Edm.MetadataWorkspace class. Mapping information is not publicly accessible. The Entity Framework uses the metadata in these types to translate queries against the conceptual model to data source-specific commands.


When are they generated?


The Entity Data Model Designer (Entity Designer) stores model and mapping information in an .edmx file at design time. At build time the Entity Designer uses the information in an .edmx file to create the .csdl, .ssdl, and .msl files that are needed by the Entity Framework at runtime

Where are they located?


By default, they included in the binary file of output under bin folder. You are not able see the physical files.
But you can also output CSDL, SSDL, and MSL Files as saparated files to bin folder. Here is how to make this happen.


After change Meta Artifact Processing to "Copy to Output Directory", rebuild your project and you will see the CSDL, SSDL, and MSL Files are generated under bin.


Related Links
What is ASO.NET Entity Framework 4.0

PrestaShop Tips - How to fix address errors with Paypal payment

If you are using Paypal as payment method at PrestaShop 1.3 or lower, you may experience some errors in case you have no configured your shipping countries correctly. Frequently seen errors are as following:

[Error 1]
Unable to process payment. Please contact the merchant as the shipping address provided by the merchant is invalid, and the merchant has requested that your order must be shipped to that address.

[Error 2]
This country requires a state selection.

Solution
At PrestaShop version 1.3.0 or lower, by default, address does not include "State", if your address from countries like USA/Canada/China with "State", Paypal will returns above error.

Here I explain in detail on how to fxi this problem.
1. Configure your shipping country correctly if you are shipping to those countries use State.

Login to your back office of your PrestaShop
Click Shipping Tab
Click Countries menu on the Shipping tag
Find the country your going to configure, for eaxmple Canada and click "Edit" icon


2. Configure states for the country

Login to your back office of your PrestaShop
Click Shipping Tab
Click States menu on the Shipping tag
Add all states (provinces) into this table for those countries require State.


3. If you using Paypal 1.6 comes with PrestaShop 1.3.1 or lower, you need to make following changes on file /modules/paypal/redirect.php. For higher version, it is fixed already.


Insert following line after line 10 (line # may differ, see screenshot for detail)


$state = new State(intval($address->id_state));


Insert following line after line 45 (line # may differ, see screenshot for detail)


<input type="hidden" name="state" value="’.$state->iso_code.’">


After you make above changes, the errors should disappear.

Note:
Please try ot create new account with new address with "State" data for testing.
If you use existing address that does not have "State" data, the same error will occur. You need to fix those address data to make them work.


Recommendations


"Agile Paypal"- A PrestaShop Paypal Express Checkout module, does no have this issue or many other issues that appear in Standard Paypal module. Plus there are many new features.Check it here for more detail

Sunday, October 3, 2010

Entity Framework - ADO.NET Entity Framework in .NET 4

What is Entity Framework 4?


The Microsoft® ADO.NET Entity Framework is an Object/Relational Mapping (ORM) framework that enables developers to work with relational data as domain-specific objects, eliminating the need for most of the data access plumbing code that developers usually need to write. Using the Entity Framework, developers issue queries using LINQ, then retrieve and manipulate data as strongly typed objects. The Entity Framework’s ORM implementation provides services like change tracking, identity resolution, lazy loading, and query translation so that developers can focus on their application-specific business logic rather than the data access fundamentals.


In the .NET Framework 4, there have been significant enhancements in the ADO.NET Entity Framework (EF). This release has focused on enabling many of the scenarios that customers have asked to focus on including two primary scenarios: Domain-Centric application development and the traditional Data-Centric web application "Forms over Data" using features such as Model First development to create a Model and then have T-SQL and customized code generated, support for Persistence Ignorance and Custom Code Generation as well as many other improvements.

Related Links
What is CSSDL,SSDL, MSL of Entity Framework?

PrestaShop Tips - How to check Paypal redirect URL and data in the form

If you are using Paypal as payment method and you experience some issues, you may want to check URL and data in the form that redirect (Post) to Paypal server. At PrestaShop, when user select Paypal as payment method, PrestaShop will automatically post order data to Paypal server and redirect user to Paypal payment page. It will help you to identify your issue quickly if you know how to check the data posted to Paypal.

Here I explain in detailed steps on how to check the URL and data in form post to Paypal. You need to have access to your source code.

1. Comment out 3 lines of modules/Paypal/redirect.php by putting two "//" before the line. (Please also see attached screen shot on how to comment out)


//$(document).ready(function() {
// $(\'#paypal_form\').submit();
//});


2. Run a test order, this time, when you select Pyapal Payment method, it will display a white page without going to Paypal.


3. Right click the page and select "see page source" (this may different for different)


4. A HTML source file is opened in a different windows. Now you can check what is post to Paypal.

Here is a sample data(please also note the 3 lines you commented).

<html><head><script type="text/javascript" src="http://YourSite/js/jquery/jquery-1.2.6.pack.js"></script></head><body>
<form action="https://www.paypal.com/cgi-bin/webscr" method="post" id="paypal_form" class="hidden">
<input type="hidden" name="upload" value="1" />
<input type="hidden" name="address_override" value="1" />
<input type="hidden" name="first_name" value="Kinro" />
<input type="hidden" name="last_name" value="SHO" />
<input type="hidden" name="address1" value="123 ABC Avunue" />

<input type="hidden" name="city" value="Toronto" />
<input type="hidden" name="zip" value="M6J 9N4" />
<input type="hidden" name="state" value="ON" />
<input type="hidden" name="country" value="CA" />
<input type="hidden" name="amount" value="29.78" />
<input type="hidden" name="email" value="customer@gmail.com" />
<input type="hidden" name="item_name_1" value="My cart" />
<input type="hidden" name="amount_1" value="39.78" />
<input type="hidden" name="quantity_1" value="1" />
<input type="hidden" name="business" value="yourpaypalaccount@paypal.com" />
<input type="hidden" name="receiver_email" value="yourpaypalaccount@paypal.com" />
<input type="hidden" name="cmd" value="_cart" />
<input type="hidden" name="charset" value="utf-8" />
<input type="hidden" name="currency_code" value="CAD" />
<input type="hidden" name="payer_id" value="3" />
<input type="hidden" name="payer_email" value="payer@hotmail.com" />
<input type="hidden" name="custom" value="267" />
<input type="hidden" name="return" value="http://YourSite/order-confirmation.php?key=17350b4e7c67f2f03156f49e1e0f192b&id_cart=267&id_module=4" />
<input type="hidden" name="cancel_return" value="http://YourSite/index.php" />
<input type="hidden" name="notify_url" value="http://YourSite/modules/paypal/validation.php" />
<input type="hidden" name="cpp_header_image" value="https://public.bay.livefilestore.com/y1pebu9bdIHkdrj_h8BErKkbRHez17815Btk4fGj-5fEFGngNH5NdKTxskuB8oqRqzZCVoMxEHpCJef_7SKIHgTRQ/logo4paypal.jpg" />
<input type="hidden" name="rm" value="2" />
<input type="hidden" name="bn" value="PRESTASHOP_WPS" />
<input type="hidden" name="cbt" value="Return to shop" />
</form>
<script type="text/javascript">
//$(document).ready(function() {
// $('#paypal_form').submit();
//});
</script>
</body></html>


The URL of Paypal should be something like "https://www.paypal.com/cgi-bin/webscr", it may be different slightly.
The data in the form should include all data required by Paypal, otherwise an error will occurs.

5. Please don't forget to restore the ./modules/Paypal/redirect.php

Saturday, October 2, 2010

PrestaShop Tips - How to change address displaying format (Back office)

At PrestaShop, the addresses are default displayed in Europe address format. They look weird for some other country's addresses for example in USA or Canada. Here I explain on how to change the address display format for USA/Canada. I separate them into front store and back office, so it will be in two posts.

Please click here to see how to change address displaying format for front store pages

Here is my second post on how to change PrstaShop address displaying format at back office and PDF invoices and PDF delivery slip. For your reference, I attached comparison screen of files before/after change.

1. ./admin/tabs/AdminOrders.php
Replace line 584,585 with following lines

'.$addressDelivery->city.($addressDelivery->id_state ? ' '.$deliveryState->name : '').' '.$addressDelivery->postcode.'<br />
'.$addressDelivery->country.'<br />
'.(!empty($addressDelivery->phone) ? $addressDelivery->phone.'<br />' : '').'
'.(!empty($addressDelivery->phone_mobile) ? $addressDelivery->phone_mobile.'<br />' : '').'


Replace line 595,596 with following lines

'.$addressInvoice->city.($addressInvoice->id_state ? ' '.$invoiceState->name : '').' '.$addressInvoice->postcode.'<br />
'.$addressInvoice->country.'<br />
'.(!empty($addressInvoice->phone) ? $addressInvoice->phone.'<br />' : '').'
'.(!empty($addressInvoice->phone_mobile) ? $addressInvoice->phone_mobile.'<br />' : '').'


These changes will change address displaying format to USA/Canada address format at order detail pages. Both shipping address and billing address of order will be displayed correctly.


2. ./classes/PDF.php
Replace line 409 -


$pdf->Cell($width, 10, $delivery_address->city.', '.Tools::iconv('utf-8', self::encoding(), ($deliveryState ? ''.$deliveryState->name : '')).', ' .Tools::iconv('utf-8', self::encoding(), $delivery_address->postcode), 0, 'L');
$pdf->Cell($width, 10, $invoice_address->city.', '.Tools::iconv('utf-8', self::encoding(), ($invoiceState ? ''.$invoiceState->name : '')).', ' .Tools::iconv('utf-8', self::encoding(), $invoice_address->postcode), 0, 'L');
$pdf->Ln(5);
$pdf->Cell($width, 10, Tools::iconv('utf-8', self::encoding(), $delivery_address->country), 0, 'L');
$pdf->Cell($width, 10, Tools::iconv('utf-8', self::encoding(), $invoice_address->country), 0, 'L');


These changes will change address displaying format to USA/Canada address format at PDF invoice and PDF delivery slip. Both shipping address and billing address of order will be displayed correctly.

HTML Tips - How to crerate Code Block using DIV tag?

In many scenarios you will need some special block in your HTML page to display set of source code. The source code itself could also be HTML.

Here is an example of code block that utilizing the DIV and PRE HTML tags.

DIV tag is used to create a code block with scroll functions.
PRE tag is used to keep the structure/layout of source code with indents.

!!! Important !!!
If your code inside the block are HTML code, you must replace character "<" with string "&lt;", and replace character ">" with string "&gt;". Otherwise the HTML will be messed up!

Below is the result of sample:


class Scene extends ObjectModel
{
/** @var string Name */
public $name;

/** @var boolean Active Scene */
public $active = true;

/** @var array Products */
public $products;

protected $table = 'scene';
protected $identifier = 'id_scene';

protected $fieldsRequired = array('active');
protected $fieldsValidate = array('active' => 'isBool');


Below are the Opening tags of DIV, PRE and their style


<div style="width: 500px; height: 280px; border: 1px solid rgb(0, 0, 200); background: none repeat scroll 0% 0% rgb(0, 0, 0); color: rgb(255, 255, 255); padding: 4px; white-space: nowrap; overflow: auto;">
<pre style="margin-top: -20px;">


Below are the closing tags of PRE and DIV

</pre>
</div>

PrestaShop Tips - How to fix PDF Invoice problem with shipping fee displayed wrong

By default at PrestaShop, the price shown at front store is tax included. I have it run for a while and changed to show price exclude tax at front store. Since then, the invoice (PDF) does not display correctly. The shipping charge is missing, it displays $0 even it is not. See below:


If I change back to show price include tax at front store again, the invoice will also become normal. I guess it is a bug of PrestaShop.

Here I found a way to fix the problem. After this fix, it displays correctly no matter you set to display price include tax or exclude tax.

Changed file: ./classes/PDF.php
Changed line: 791 (this is ver 1.3.1, line # may be different for other version)
Changes made: replace the same line with below line.

$priceBreakDown['shippingCostWithoutTax'] = ($carrierTax->rate AND $carrierTax->rate != '0.00' AND self::$order->total_shipping != '0.00' AND Tax::zoneHasTax(intval($carrier->id_tax), intval($id_zone))) ? (self::$order->total_shipping / (1 + ($carrierTax->rate / 100))) : self::$order->total_shipping;

PrestaShop Tips - How to change address displaying format (front store)

--------------------------------------------------------------
Note: (edited on August 27, 2011)
If you are using PrestaShop 1.4x and above, you are able to change the format at your back office. Back Office - Shipping - Countries - edit country and change Address Layout
--------------------------------------------------------------

At PrestaShop, the addresses are default displayed in Europe address format. They look weird for some other country's addresses for example in USA or Canada. Here I explain on how to change the address display format for USA/Canada. I separate them into front store and back office, so it will be in two posts.

For changing address displaying format in back office, please click here

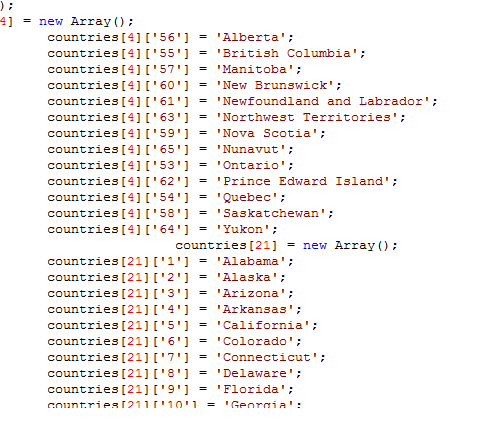
Here is my first post on how to change PrstaShop address displaying format at front store. For your reference, I attached comparison screen of files before/after change.


1. ./themes/yourTheme/addresses.tpl
Replace line 25,26 with following two lines


<li class="address_city">{$address.city} {if isset($address.state)} {$address.state}{/if} {$address.postcode} </li>
<li class="address_country">{$address.country}</li>


2. ./themes/yourTheme/order-address.tpl
Replace line 6 with following line

addresses[{$address.id_address|intval}] = new Array('{$address.company|addslashes}', '{$address.firstname|addslashes}', '{$address.lastname|addslashes}', '{$address.address1|addslashes}', '{$address.address2|addslashes}', '{$address.postcode|addslashes}', '{$address.city|addslashes}', '{$address.country|addslashes}','{$address.state|addslashes}');


3. ./themes/yourTheme/order-detail.tpl
Replace line 53,54 and with following lines

<li class="address_city">{$address_invoice->city|escape:'htmlall':'UTF-8'} {if $invoiceState} {$invoiceState->name|escape:'htmlall':'UTF-8'}{/if} {$address_invoice->postcode|escape:'htmlall':'UTF-8'}</li>
<li class="address_country">{$address_invoice->country|escape:'htmlall':'UTF-8'}</li>

Replace lin 64,65 with following lines

<li class="address_city">{$address_delivery->city|escape:'htmlall':'UTF-8'} {if $deliveryState} {$deliveryState->name|escape:'htmlall':'UTF-8'}{/if} {$address_delivery->postcode|escape:'htmlall':'UTF-8'} </li>
<li class="address_country">{$address_delivery->country|escape:'htmlall':'UTF-8'}</li>


4. ./themes/yourTheme/shopping-cart.tpl
Replace line 214,215 with following lines

<li class="address_city">{$delivery->city|escape:'htmlall':'UTF-8'} {if $delivery_state}{$delivery_state|escape:'htmlall':'UTF-8'}{/if} {$delivery->postcode|escape:'htmlall':'UTF-8'}</li>
<li class="address_country">{$delivery->country|escape:'htmlall':'UTF-8'} </li>

Replace line 225,226 with following lines

<li class="address_city">{$invoice->city|escape:'htmlall':'UTF-8'} {if $invoice_state}{$invoice_state|escape:'htmlall':'UTF-8'}{/if} {$invoice->postcode|escape:'htmlall':'UTF-8'}</li>
<li class="address_country">{$invoice->country|escape:'htmlall':'UTF-8'} </li>


5. ./themes/yourTheme/js/order-address.js
Replace line 47,48,49 with following lines

$('ul#address_' + addressType + ' li.address_name').html(addresses[idAddress][1] + ' ' + addresses[idAddress][2]);
$('ul#address_' + addressType + ' li.address_address1').html(addresses[idAddress][3] +',');
$('ul#address_' + addressType + ' li.address_address2').html(addresses[idAddress][4] +',');

Replace line 54,55 with following lines

$('ul#address_' + addressType + ' li.address_city').html(addresses[idAddress][6] + ' , ' + addresses[idAddress][8] +', '+addresses[idAddress][5]);
$('ul#address_' + addressType + ' li.address_country').html(addresses[idAddress][7] +'.');